Baseboard heaters are a great way to add warmth and ambiance to any room in your house. They’re also very affordable, especially if you buy them second hand or refurbish an older model. But if you’re going to be living with a baseboard heater for years, it’s worth taking the time to find out how to install baseboard heater covers to make sure you don’t lose efficiency.
Let’s take a look at how to install custom baseboard heater covers.
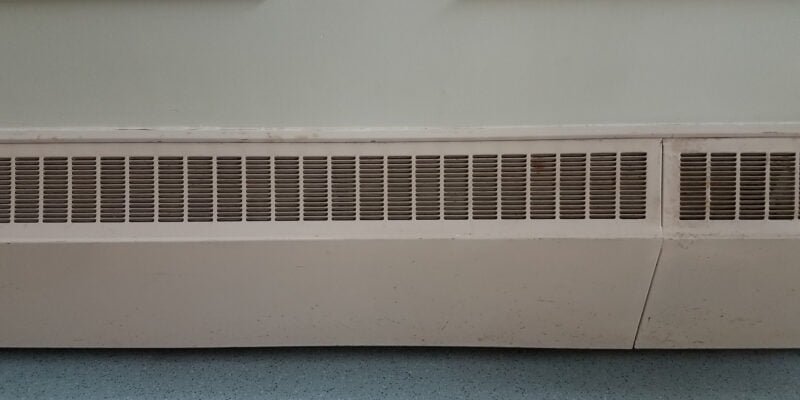
What are baseboard heater covers?
Baseboard heater covers are the type of heating device that sits on top of a wall. They can be covered with a range of different colors, styles, sizes and types to match any room or theme.
One main purpose of baseboard heater covers is to prevent water from entering the home. Another purpose is to protect the walls from getting too hot and potentially damaging them. Additionally, they can help decorate your home by adding some extra style to the room.
Baseboard heater covers come in a variety of colors and materials so you can choose the perfect one for your needs. You may also want to consider how easy it is to install and whether or not you need any special tools. Most importantly, make sure that you select a cover that will protect your home against water damage!
Why install custom baseboard heater covers?
One of the best reasons to install custom baseboard heater covers is because it can add a personal touch to your home. In addition, it’s a great way to save money on your energy bill. You can also choose from a variety of materials that will be sure to match the style of your home.
How to choose the right baseboard heater cover for your needs?
When it comes to heating your home, you have a lot of different options to choose from. One of those is baseboard heater covers. These covers come in a variety of shapes and sizes, and each has its own benefits and drawbacks. So, how do you know which one is right for you.
The first thing you need to consider is what type of heating system you have. If you have a central heating system, register and grille covers are ideal because they’re easy to install and keep the heat contained in one area of your home. However, they don’t improve efficiency or safety. For a central heating system, decorative register covers make your heating system look good without sacrificing function or safety.
If you have a baseboard heating system, be careful when measuring the size of vents and registers, as they vary depending on their function and size. Most baseboard heaters can be replaced in about an hour, so it’s not too difficult to find the right cover if yours happens to get damaged over time. Most covers can be replaced with a reciprocating saw after cutting the screws off–just make sure you measure correctly before purchasing!
How to install a custom baseboard heater cover
Installing a custom baseboard heater cover is an easy process that can be completed in a few minutes with the right tools. All you need is an Allen wrench, which is included with your order, and some patience. The covers come primed and painted white satin, so they are ready to install as soon as they arrive.
The first step is to remove the old cover from the wall if there is one present. Be careful not to damage the wall or the heating element while removing it. If you are installing a new cover over an existing one, make sure that it fits snugly against the wall and that all of the screws are tight.
Once the old cover has been removed or if this is your first time installing a baseboard heater cover, locate the four screws at each corner of the unit and remove them using your Allen wrench. Slide off the top panel of the cover and set it aside.
Now it’s time to measure for your new custom baseboard heater cover. Measure from end to end and then side to side at both the top and bottom of your heating element. Add 1/2 inch to each measurement for wiggle room and write these down somewhere safe–you will need them later on.
Now it’s time to install your new cover. Align the top of the unit with the top of your heating element and slide it down until the screws at each corner are in place. Replace the screws and tighten them using your Allen wrench. Make sure that the cover is sitting evenly against the wall and replace the top panel.
Your new custom baseboard heater cover is now installed!
Tips and tricks for installing baseboard heater covers correctly
Installing a baseboard heater cover can be a tricky process, but it’s important to do it correctly in order to get the most out of your investment. Here are a few tips and tricks to help you get the job done right:
1. Make sure you have the right size cover for your baseboard heater. Most covers come in a variety of shapes and sizes, so it’s important to read the manual carefully before installation.
2. Always install a baseboard cover according to the manufacturer’s instructions. Never try to install a cover without reading the manual!
3. Use silicone sealant to avoid any leaks or gaps in the works. This will help keep your baseboard heater cover in place and prevent any heat from escaping.
4. Check for compatibility with your heating system before you buy. Not all covers are compatible with every type of heating system, so make sure you choose one that will work with yours.
5. Be prepared for some minor assembly required – most covers will come with some form of assembly required, so make sure you have all the necessary tools on hand before starting the installation process.
Keep reading for more top tips on decorating your home!