Last Updated on
January 12th, 2023 03:06 pm
Have you ever wondered how to drill into a stud without destroying your entire wall? After all, it can be an incredibly daunting task.
Drilling into a stud is the process of using a drill to get through wood, metal or other materials. The method involves drilling from one side and turning it 180 degrees before continuing on with the rest of the drill.
So let’s have a look and see how to drill into a stud using our step-by-step guide!
How to Tell if You’re Drilling into a Stud
When trying to hang a picture or mount something on the wall, it’s important to know where the wall studs are. That’s where a stud finder comes in handy.
Method 1: Stud Finder
There are two types of stud finders. These are electronic studs and magnetic studs . Electronic ones emit a beeping noise when you come across a stud. Magnetic units are more accurate but can’t be used if the wall is covered in popcorn.
A stud finder must be placed flat against the wall to detect metal or wood studs, and must be moved along the wall slowly for it to work properly on large walls. If you’re working on a textured ceiling, an electronic unit will not work, but you can use a magnetic one. The process of finding metal or wood studs with a stud finder is exactly the same on smooth surfaces as it would be on a textured wall.

Method 2: Tap the Wall
The tap the wall trick is a good way to verify that you’re not drilling into drywall. If you’re uncertain about whether you have hit a stud while drilling, this is an easy way to find out. By tapping on the wall where you think the stud is, and then listening for a difference in sound when compared to other parts of the wall, you can determine if there is a stud present. There are other ways to find studs in a wall, but these two methods are by far the easiest and most convenient.
How to Drill into a Stud
Now you know how to locate a stud, here are 4 steps to drilling into a stud.
Step 1: Prepare the Area
Don’t drill above or below light switches and outlets.
You can avoid costly mistakes by not drilling directly on top of electrical wiring in the walls. The best way to avoid accidents is by using a stud finder and wire detector.
You should shut off the power and water before you start drilling near pipes, live wires or electrical lines that may be present in your home.
Step 2: Find the Edge and Center
Now that you have found the approximate location of the stud, it is time to find the edge and center.
To do this, you will need a metal ruler or a tape measure.
- Measure from one end of the wall to the other and make a note of the measurement.
- Then divide that number in half and mark it on your wall. This is where you should drill your hole.
- The center of the stud is usually about 16 inches from either side of the wall.
- Once you have marked both ends of the stud, use a metal ruler or tape measure to find its center.

Step 3: Choosing a Drill Bit
Once you have determined what type of material you will be drilling into, it’s time to choose the drill bit.
When drilling into wooden studs through a plaster wall, use a spade bit or a self-feeding bit and decent quality wood screws. Be aware that there might be metal plates known as nail plates behind the wooden stud protecting electrical wires or a water pipe so you may hit some resistance.
For steel studs, use a drill bit made specifically for metal. Be careful not to use too much pressure when drilling through metal as this can cause damage to the stud and damage the screw heads. And of course, make sure you’ve not discovered a nail plate!
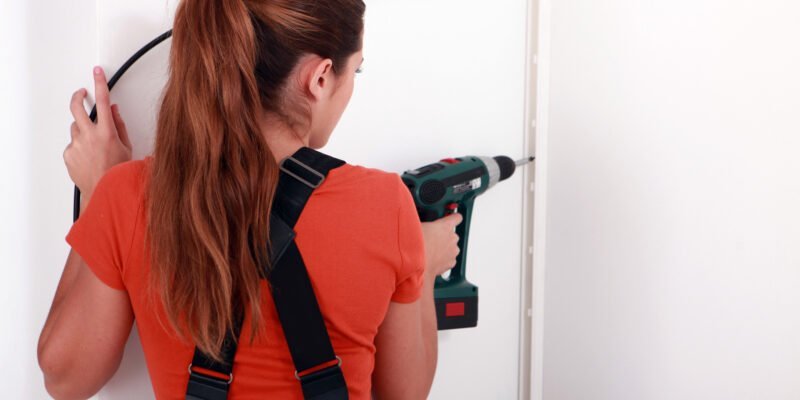
Step 4: Drilling
Now that you have your drill bit sharpened, it’s time to start drilling into the stud. Here are a few tips:
- Make sure to place the tip of the screw on your mark before beginning to drill. This will ensure that your hole is in the right spot.
- The drill should be level with the screw so it goes in straight- if it’s not, you may end up with a crooked hole.
- Apply pressure to the back of the screwdriver while drilling into a stud. This will help keep the drill bit stable and make it easier to penetrate through tough materials.
- If you’re having trouble, consider switching to an impact driver. An impact driver has more power and can help you get through tougher materials faster.
Just like with Step 3, make sure you don’t drill the screw all the way into wall- this can cause damage and make it difficult to attach anything securely.
How Far Should a Screw Go into a Stud?
It’s important to make sure your screws are properly secured in order to avoid any accidents or injuries down the line. When hanging heavier objects on a wall–like televisions–you’ll need to use a bracket set with screws that go deep into the stud. The depth of the screw should be 1 inch, which is enough to provide sturdy support for your belongings.
However, if you’re hanging something light like a picture frame, then a regular screw will do just fine. It doesn’t need to go as deep into the stud. For metal studs, self-tapping screws or toggle bolts work best for securing pictures. Just remember: when using toggle bolts, make sure you expand and tighten them so that they fully engage with the threads!
How to Screw into Drywall without a Stud
Screwing into drywall without a stud can be tricky, but with a little know-how it’s doable. A good rule of thumb is that if a heavy item is too heavy for a hook, it’s probably too heavy for a drywall screw. When you’re hanging something on the wall, you have three options: use a stud, put up some drywall anchors, or use toggle bolts.
Drywall anchors are the preferred method for drywall without a stud. That’s because they provide a secure hold and are easy to install. To use them, simply drill a hole in the drywall and insert the anchor. Then, screw your item into the anchor.
Toggle bolts are another option for hanging items on drywall without a stud. They work by expanding when you tighten them, which provides extra grip and stability. Just make sure that you expand them enough so that they fully engage with the threads.
No matter which method you choose whether drywall anchors or toggle bolts, make sure to use the right size screws and anchors for your item. This will ensure that it’s securely attached to the wall and won’t come loose over time.
Do You Need a Pilot Hole for Drywall?
Driving screws into drywall or wood without pilot holes is generally not necessary–you should be using other methods. For example, when you drive in screws without pilot holes, the chance of splitting and weakening the wood is greater. Oak has more complex structures than pine and is more difficult to drill into, leading to higher risk for splitting and cracking. Pine is easier to drill than oak, but it still needs a pilot hole drilled first.
Drilling a pilot hole for pine makes driving in screws much easier because it guides the screw into the drywall–and prevents stripping the head of the screw while applying too much force. Pilot holes will help guide a screw when you’re using power tools instead of hand tools like a screwdriver or drill bit.
Take Your DIY to the Next Level!
So, there you have it! We hope that this article has helped provide a step-by-step guide on how to drill into a stud. Of course, depending on the situation, you might need the help of a professional. Remember to always have the right equipment and technique, as well as an understanding of causes before attempting this repair yourself.
And lastly, don’t forget to read more and enjoy your new-found DIY knowledge!